Art Impressions is launching two brand new Mini Try-fold sets today, and I am sharing a step by step tutorial here and on the
Ai blog. Warning, photo alert!! I wanted to show you exactly how the set works, so bear with me! Here's my card:
I'm so excited to share the new Ai Mini Try-folds with you today! These make the absolute prettiest cards that you can imagine. I have all kinds of photos to share, with step by step instructions, so grab your coffee, and scroll down a ways to see how easy these are to create.
I am using Blessings To You MTF (Sku# 4758). The set includes 3 images, a sentiment, and two small dies, along with complete instructions for cutting and stamping on the back of the package.
My cardstock is 4 1/2"x11" and is scored into thirds. I stamped the largest image, centered on the right panel, and then placed the larger die over the opening in the middle of the image.
After running it through my Cuttlebug, I folded the card sides in, and traced lightly around the opening with a pencil, onto the cardstock flap underneath. This allows me to see where the next image should be stamped.
With the top flap open, here you can faintly see where I'd traced through the opening, and now have stamped the second image over the pencil lines. Then I will fit the smaller die into the center of this image, and run it through my machine.
Once more, I will trace around the opening through to the bottom panel, which is the inside of the card.
Look closely! You'll see the faint pencil outline which shows me where to position the small bunny image. I put both the bunny and the sentiment onto the same acrylic block and stamped them over the pencil shape.
So after stamping the bunny - this is what the card looks like with all of the panels folded. The positioning of the images does not have to be exact - the idea is that you want to see a glimpse of all three layers when the card is folded shut. Here are the layers coloured with Copic markers:
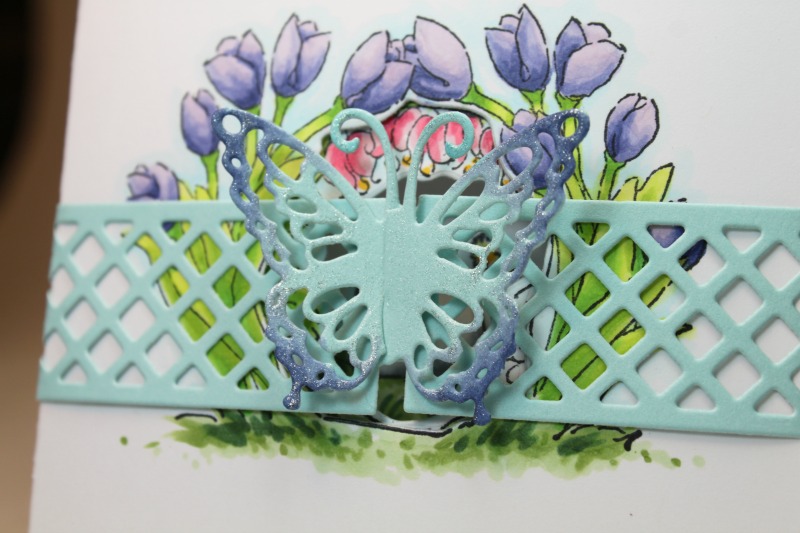
In addition to the two Mini TF sets, we are also launching two new Clasp dies designed especially for the Mini TF's. I'm showing Butterfly Clasp Die (Sku #4748):
I secured the die onto my cardstock with some washi tape, so that it would stay in place. I only have the shorter base plate for my die cut machine, so I ran it through once, then turned the die around and ran the other end of it through - the tape kept the die from moving around.
All of the Ai dies cut beautifully. The clasp simply wraps around the Mini TF, and there is a small slit on each butterfly that allows them to interlock, forming a belly band to keep the Try-fold closed. I used my purple Copics to tint the edges of my butterfly, and then coated him with some Wink of Stella so that he shimmers. Thanks for hanging in there through all of my photos! Enjoy!
Copics used: BV04, BV02, BV01, BV00, BV000, YG05, YG03, YG01, YG00, G46, G43, G40, R35, R32, R30, C3, C1, C00, B000, B0000, Y35, Y32, Y11.


2 comments:
Great tutorial and such a pretty try-fold! Love the added grass with the bunny!
Fantastic tutorial and amazingly gorgeous card, Karen!! Your coloring is beautiful as always. :)
Post a Comment